
Introduction to Remove Background from Picture in PowerPoint
If you’ve ever needed to polish up a slide by isolating an image’s subject, you’re in the right place. In this guide, you’ll learn exactly how to remove background from picture in PowerPoint. We’ll walk you through the steps, address common questions like how do you remove a background from an image in PowerPoint and remove background picture from PowerPoint slide, and share tips for different versions and devices.
So, how do you remove a background from an image in PowerPoint? Simply insert your image, select it, and use the “Remove Background” tool found in the “Picture Format” tab. For a full rundown, read on, you’ll find plenty of practical insights throughout this article.

| Step | Description |
| Insert Image | Click on “Insert” > “Pictures” to add an image to your slide. |
| Select Image | Click on the image to activate the “Picture Format” tab. |
| Remove Background Tool | In the “Picture Format” tab, click “Remove Background.” |
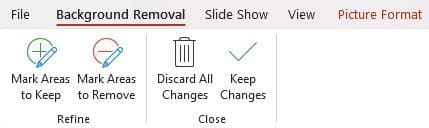
| Adjust Selection | PowerPoint will highlight the background in purple. Use “Mark Areas to Keep” or “Mark Areas to Remove” to refine the selection. |
| Apply Changes | Click “Keep Changes” to finalize the background removal. |
| Save or Edit Further | Make additional edits or save the image with a transparent background if needed. |
Looking for more ways to create stunning presentations? Check out our services in do my powerpoint and contact us for additional help that will take your slides to the next level.
Getting Started with PowerPoint’s Background Removal
PowerPoint offers a handy built-in tool for cleaning up images. This feature helps you quickly separate the subject from the background so your slides look crisp and professional. Whenever you need to remove background from photo in PowerPoint, the process is straightforward and user-friendly.
When you insert an image, PowerPoint automatically tries to distinguish between the foreground and the background. It gives you the option to mark specific areas that need to be kept or removed. This quick solution is perfect when you’re in a hurry or don’t have access to advanced graphic software.
Step-by-Step Process to Remove Backgrounds
Follow these easy steps to remove a background from an image in your PowerPoint slide:
1. Insert Your Image
Open your PowerPoint file and add the image you wish to edit:
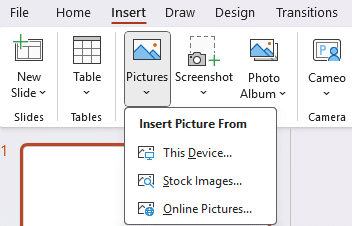
a. Go to the Insert tab.
b. Select Pictures and choose your desired image.
2. Open the Background Removal Tool
Once the image is on the slide, click to select it. You’ll notice the Picture Format tab appears:
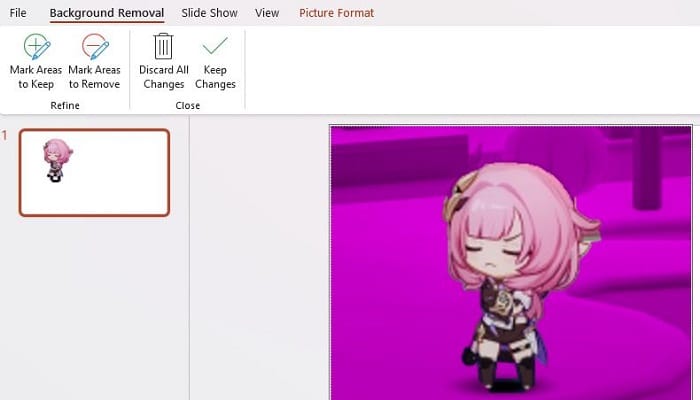
a. Click on Remove Background.
b. PowerPoint will automatically highlight the area it thinks should be removed.
3. Refine the Selection
The tool may not be perfect, so use the available options to adjust:
a. Click Mark Areas to Keep to save parts of the image that were mistakenly marked.
b. Click Mark Areas to Remove to adjust the area further if needed.
c. Zoom in if necessary to ensure you’re getting the details right.
4. Apply Your Changes
Once you’re happy with your selection, hit Keep Changes. The background will be removed, leaving you with a clean, transparent image.
This process addresses the basics of how to remove background from picture in PowerPoint. For more detailed tips on different versions, keep reading.
In this step-by-step tutorial by Kevin Stratvert, learn how to remove a background from a photo in Microsoft PowerPoint:
Comparing PowerPoint Versions
The following table summarizes the key features and differences in PowerPoint’s background removal tool over various versions:
| PowerPoint Version | Tool Availability | Key Points |
| PowerPoint 2007 | Basic; requires workarounds | Limited editing options; manual cropping often needed |
| PowerPoint 2010 | Present, but basic | Simple marker tools; may need extra adjustments |
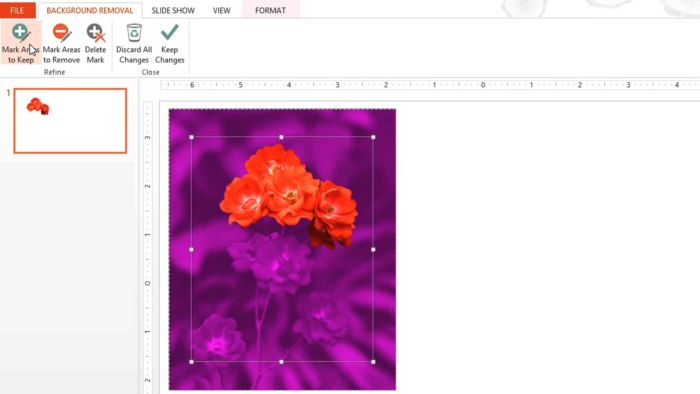
| PowerPoint 2013 | Improved tool | Better interface with clearer foreground/background separation |
| PowerPoint 2016 | Robust and user-friendly | Effective automatic detection; easy refinement options |
| PowerPoint 2022 | Modern interface | Advanced options integrated into the tool |
| PowerPoint 2023 | Streamlined experience | Faster processing and intuitive controls |
| PowerPoint 2024 | AI-assisted enhancements | Excellent accuracy; minimal manual tweaks required |
Detailed Guides for Specific Versions
PowerPoint 2007
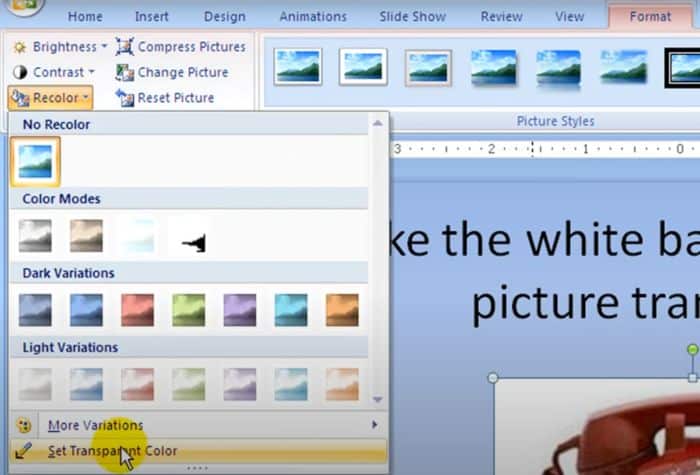
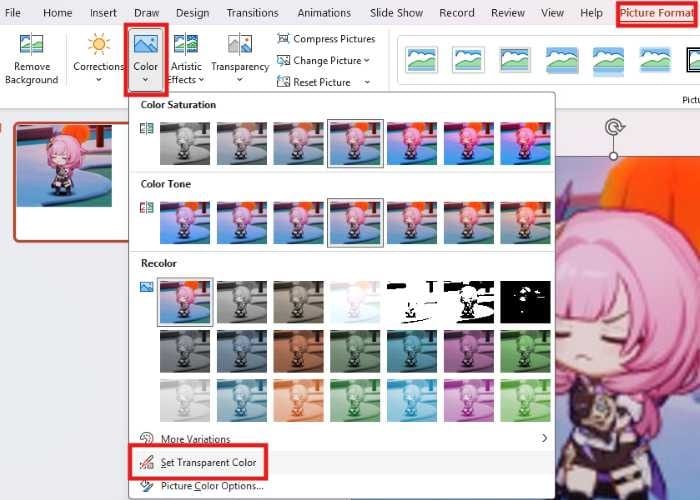
For those still using this version, PowerPoint 2007 lacks the “Remove Background” tool. Instead, use “Set Transparent Color” to remove a background color from a picture in PowerPoint. Go to “Picture Format,” click “Recolor,” then “Set Transparent Color,” and pick a color (like white) to make transparent. This works only for solid colors, not complex backgrounds.
You might need to rely on cropping tools or even external editors. If you frequently need to remove background from image in PowerPoint 2007, consider these workarounds:
• Manual Cropping: Remove larger areas manually.
• External Tools: Sometimes using a third-party tool before reimporting the image can save time.
PowerPoint 2010
This one simplifies the background removal further:
• Add your picture and choose Remove Background.
• Refine the selection using simple marker tools.
Basic, yet this version does the basic tasks the way they are supposed to be done.
PowerPoint 2013
The working of PowerPoint 2013 is the same as that of its predecessor version, PowerPoint 2010, but with a more polished feeling:
The tool does a better job at separating image foreground; simply insert, remove, edit, and save. These improvements mean less time is spent on tweaking the selection.
PowerPoint 2016
PowerPoint 2016 saw a gigantic leap. Background removal becomes very easy in PowerPoint 2016 because of the ease of use:
• Remove Background under the Picture Format tab, and click on the marker tools to get a clearer picture for you.
As noted by experts at SlideModel, PowerPoint 2016 makes image editing straightforward.
PowerPoint 2019
In PowerPoint 2019, you will see a refreshed interface and improve performance:
• The process is almost the same, insert, remove and adjust-with much more refined detection capabilities.
This version brings more precision and cuts down manual corrections on your part.
PowerPoint 2023
The background removal tool gets even faster in PowerPoint 2023, cutting the work required to make changes down to a few clicks. Enhanced detail control makes it easy to deal with more complex images.
PowerPoint 2024
PowerPoint 2024 steps up the game with AI-assisted background removal: The tool automatically enhances detection, meaning you rarely need to make manual tweaks. A perfect workplace tool when you need things finished in a hurry at reliable quality.
As shared by iSpring Solutions:
“The 2024 update in PowerPoint harnesses AI to deliver the most precise background removal experience yet.”
How to Remove Background on Different Devices
Remove Background On a Mac
Mac users can follow a similar process:
• Open your presentation, add the image, and go to the Picture Format tab.
• Click Remove Background and use the marker tools to perfect the selection.
• The steps for removing background from picture in PowerPoint Mac mirror those on Windows.
Remove Background On an iPad
On iPad, functionality is limited but still usable:
• Tap your image to reveal the editing menu.
• The background removal tool is available under the Picture tab.
• Use your finger to mark the areas to keep or remove, making it easy to remove background from picture in PowerPoint iPad even on the go.
Removing a Solid Color Background
Sometimes your image might have a uniform color that you need to eliminate:
Use “Remove Background” for complex images or “Set Transparent Color” for solid colors. The latter is quick: select the image, go to “Color” > “Set Transparent Color,” and click the solid color area.
Troubleshooting Common Issues
When the Background Isn’t Detected Correctly
In case of any inaccuracies in the automatic selection:
• Zoom into the image and sort it out precisely with marker tools.
• An additional pass or two can get it just right sometimes.
If Set Transparent Color Falls Short
Sometimes, Set Transparent Color will not produce the product you expected.
• Ensure your image format supports transparency, like PNG.
• Using the dedicated background removal tool often provides more reliable control.
Efficient Editing of Multiple Images
For presentations that contain several images:
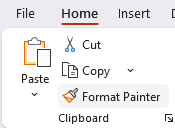
• Edit one image thoroughly, then use the format painter to apply similar settings to others.
• PowerPoint may not natively support batch editing, but this method can save you countless hours of work.
Advanced Tips for a Polished Look
Finishing Edges and Details
Depending upon the moment and importance of precision being considered:
• Zoom in closely to where selections can be better fine-tuned.
• Use the tool to remove the particulars as many times as needed to get the edges accurately cleared.
• Use the erase tool to clean up small imperfections around the edge, should there be any left behind.
Combining Editing Tools
Sometimes the best method is to combine different features of PowerPoint:
• Adjust brightness and contrast once the removal tool has been used.
• Add your edited image over differently colored shapes or slides for a professional touch.
Saving and Reusing Your Images
After the image has been perfected:
• Save it in the PNG format to maintain transparency.
• You can now build an archive of these edited images for future presentations so that you would not be falling behind in time.
Frequently Asked Questions (FAQ)
How do I make a picture background transparent in PowerPoint?
Insert your image, select the Remove Background tool, mark the areas you want to keep or remove, and select Keep Changes. Once this process is done, the background will become transparent.
What should I do when the Set Transparent Color tool doesn’t work?
If that tool does not quite fit your needs, make sure your image supports transparency, preferably a PNG image, and switch to the more versatile background removal tool to gain better control.
How do I remove the background from a picture in PowerPoint?
Here is what you do:
1. Insert your image.
2. Under the Picture Format tab, click on Remove Background.
3. Then using the marker tools, adjust the selection made.
4. Finally, click on the Keep Changes tab.
Can I remove the background from any picture in PowerPoint?
Most of the time, this tool will work; incredibly complicated backgrounds may require additional manual tweaking.
What if PowerPoint doesn’t detect the background accurately?
Zoom in on your image and use the Mark Areas to Keep or Mark Areas to Remove tools to manually fine-tune the selection.
How do I remove background in PowerPoint and make it transparent?
Follow the standard process, insert the image, use Remove Background, adjust the selection, and then save it as a PNG to maintain transparency.
What is the quickest way to remove backgrounds from multiple images in PowerPoint?
Microsoft PowerPoint doesn’t have a batch command for multiple photos, but you can work to remove the background from only one photo and then utilize the format painter to quickly apply similar settings to all others.
How can I make the background of a picture transparent in PowerPoint?
To reiterate, use the Remove Background feature, mark your selection finely, and press Keep Changes to conclude.
Can I apply a specific color to the image background after removing it in PowerPoint?
Yes. Once the background is removed, you can insert a colored shape behind your image to keep a consistent design look.
Conclusion
It is important to know how to separate the background from the picture in PowerPoint as this will make the slides to appear more organized and professional. Whether you are using the previous version of PowerPoint 2007 or the newest one, PowerPoint 2024, these steps will help you get all the necessary tools to select your images and make your presentation look more professional.
For additional guidance on how to create a timeline in PowerPoint, how to add merge shapes in PPT, or for professional PowerPoint design services, check out our expert solutions.
If you need a detailed breakdown of PowerPoint Presentation Price List in 2025, visit our pricing guide for an estimate of costs for high-quality presentation designs.
We hope this guide has helped to answer your questions and provide some useful tips, from solving some of the most common problems to using some advanced techniques to make the adjustments more precise. It should be noted that all the versions and devices, including PC, Mac, and iPad, have almost the same and quite simple way of removing the background.
For more information, guides, and most importantly, professional presentation design services for improving your slides, visit DoMyPowerPoint. We are presentation design agency that is dedicated to assist you in creating your presentations to make them more attractive and compelling.


