
Introduction to Change PowerPoint to Portrait Layout
Ever wondered how to switch your PowerPoint slides to a vertical layout? Whether you’re putting together a poster, designing a presentation that shines on a mobile screen, or simply prefer a portrait style, making the shift from the usual landscape setup is easier than you might expect.
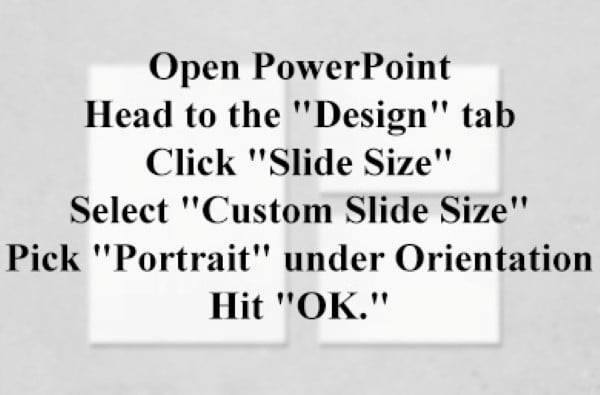
Here’s the quick version: Open PowerPoint, head to the “Design” tab, click “Slide Size,” select “Custom Slide Size,” pick “Portrait” under Orientation, and hit “OK.” Your slides are now vertical! But if you’re curious about customizing sizes like A4 or A3, or even mixing portrait and landscape slides, keep reading. There’s plenty more to explore.
 This guide comes straight from the expert team at domypowerpoint.com. We’re all about simplifying your PowerPoint experience, contact us and let us lend you a hand in making your slides just the way you want them.
Why Choose a Vertical Layout for Your PowerPoint?
Classic PowerPoint presentations have always been designed to be used in landscape mode, but things are changing. The alternative formats that are available include the portrait mode which gives a new and refreshing look that is great for digital posters, social media graphics, or even printed handouts. If you have the question of how to make PPT vertical on your device then you have come to the right place.
Think of a presentation that is more convenient to use on your phone, or a presentation that will grab people’s attention at a conference because of its unique shape. That’s the advantage of using vertical slides and this article will help you achieve that look.
There are many reasons to choose the vertical orientation and here are the most important ones:
Modern Aesthetics: Vertical slides provide a novel and elegant appearance that can enhance the appearance of your presentation in a crowd of standard designed presentations.
Mobile First Design: Since the number of people using smartphones and tablets to consume content is increasing, the portrait orientation can be easier to use.
Versatility: Vertical presentations are very useful for producing digital posters, infographics, and printed products including A4, A1, or A3 size papers.
Enhanced Storytelling: The natural flow of a vertical slide will lead your audience’s eyes down the page, which will help them to follow your story more easily.
Reputable sources agree that a simple change in orientation can significantly influence the overall impact of your presentation. For instance, SlideModel highlights that “changing the page orientation in PowerPoint can open up a range of creative possibilities for your design,” while MagicSlides emphasizes the strategic benefits of adopting a vertical approach.
Step-by-Step Guide
Now that we are done with the introductory part of the guide, let us jump right in. We will be talking basic stuff first before moving on to advanced mixing of orientation within your presentation.
Step 1: Open your presentation and find your settings
1. Open PowerPoint: Launch your PowerPoint and open your presentation file.
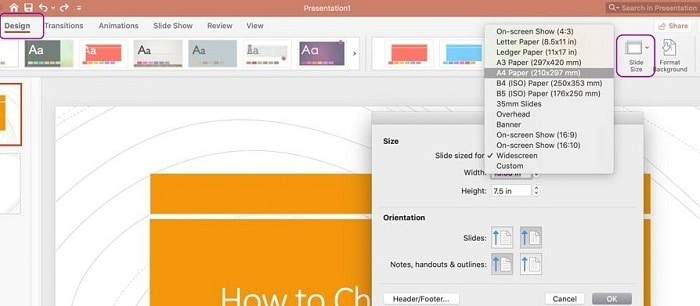
2. Go to the Design Tab: The Design tab is on the top ribbon, where you will find options for customizing your slide dimensions.
3. Choose Slide Size: You need to click on the Slide Size option. Depending on your version of PowerPoint, some may find “Custom Slide Size” or “Page Setup.”
 Step 2: Change to portrait orientation
1. Now under the settings dialog box of Portrait mode, choose your orientation: Here you need to select Portrait under the settings dialog box which will allow both Landscape or Portrait options.
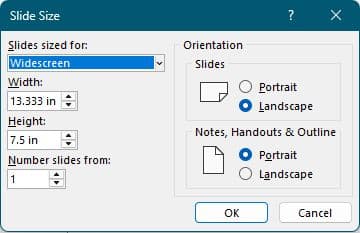 2. Customize Your Dimensions: In case you are designing a specific format say, if it is A4 or A1 or A3, now you can enter the custom measurement:
a. A4 Portrait: 8.27 x 11.69 ins.
b. A1 Portrait: 23.4 x 33.1 ins.
c. A3 Portrait: 11.7 x 16.5 ins.
3. Click OK: Now after clicking OK to apply the new orientation, PowerPoint may ask if you would like to maximize or ensure fit-choose according to what applies best for the content.
Step 3: Adjust and fine-tune your slides
After the orientation change to vertical, you will have to adjust the content somewhat. Text boxes, images, or maybe charts do not align perfectly in nature with the new format.
• Reorganize elements: Move and resize them in such a way that they allow themselves to fit naturally inside the vertical space.
• Check fonts and colors: Sometimes, a change in orientation requires a couple of minor tweaks with font size or color contrast.
• Review: Go through the whole of your slides one at a time, with an eye towards observing that nothing is too close or seems odd.
PowerPoint Slide Sizes for Portrait Orientation:
| Paper Size | Width (mm) | Height (mm) | Best Use Case |
| A4 | 210 | 297 | Standard documents, handouts |
| A3 | 297 | 420 | Posters, large prints |
| A1 | 594 | 841 | Large posters, displays |
How to Change Slide Orientation and Scale in PowerPoint by Excel at the Office
How to Make One Slide Vertical in PowerPoint
Sometimes, you might only want to highlight a single slide with a vertical format while keeping the rest in landscape. PowerPoint doesn’t naturally let you mix portrait and landscape slides in one file. But Here’s a workaround.
1) Link Back to Your Original Presentation: If you need a seamless flow between formats, hyperlink the slides:
a) Click Action on the Insert tab.
b) In the Action Settings dialog box, click Hyperlink to and, from the list, scroll down and select Other PowerPoint Presentation.
c) In the Hyperlink to Other PowerPoint Presentation dialog box, locate and click the other presentation and then click OK. The Hyperlink to Slide dialog box appears.
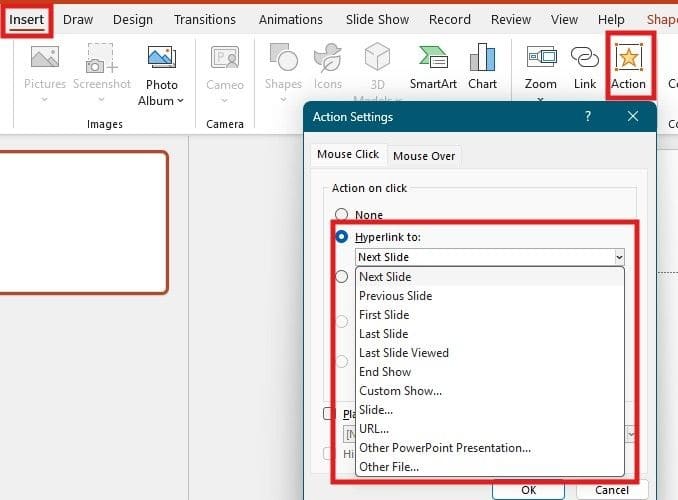 d) In the Hyperlink to Slide dialog box, under Slide title, click the slide that you want to link to, and then click OK.
e) Finally, click OK in the Action Settings dialog box.
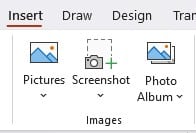
2) Use Images:
a) Build your portrait slides in a separate file.
b) Export them as images (File > Save As > PNG or JPEG).
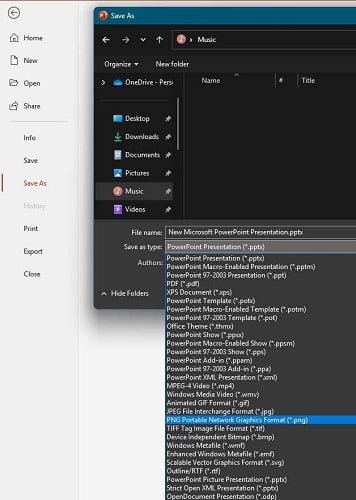 c) Insert those images into your landscape presentation (Insert > Pictures).
 This approach is great if you have a special announcement or a standout graphic that deserves its own format. It keeps everything connected and gives the illusion of a single, mixed-orientation presentation.
Comparison Table: Landscape vs. Portrait Layout in PowerPoint
Below is a table comparing the two main slide orientations to help you decide which format best suits your needs:
| Aspect | Landscape (Horizontal) | Portrait (Vertical) |
| Usage | Standard presentations, slideshows, and lectures | Digital posters, social media graphics, printed handouts |
| Audience Engagement | Familiar and traditional | Modern and engaging, ideal for mobile viewing |
| Design Flexibility | Wide layout for expansive content | Vertical flow that emphasizes sequential storytelling |
| Multimedia Integration | Optimal for widescreen videos and images | Can require video reformatting, but enhances visual impact |
| Customization | Easy to modify with built-in templates | Requires adjustments for text and graphics alignment |
| Printing | Best for large-screen displays | Ideal for printed documents like A4, A3, and A1 formats |
Making Vertical Presentations on Different Platforms
No matter your device or operating system, you can create stunning vertical presentations. Let’s see how:
Switching to Portrait on Your iPhone
Using the PowerPoint app on your iPhone? Here’s how to make it vertical:
1. Open the App: Load your presentation.
2. Go to Design: Tap “Design” (you might need to swipe to spot it).
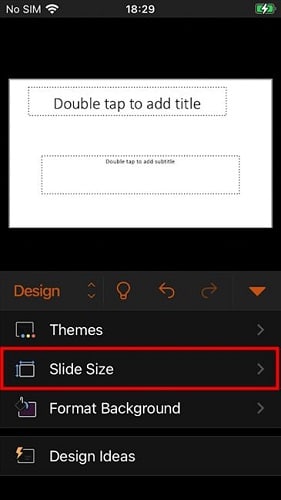 3. Select Slide Size: Tap “Slide Size” then “Custom Slide Size.”
4. Choose Portrait: Switch to “Portrait” and tap “Done.”
The iPhone’s screen size makes this a great fit for vertical layouts on the go.
How to Make PowerPoint Vertical on Mac
On a Mac, it’s almost the same as the desktop version, with a slight twist:
1. Open PowerPoint: Get your file ready.
2. Head to Design: Click the “Design” tab.
3. Find Page Setup: Click “Slide Size” then “Page Setup.”
 4. Set to Portrait: Choose “Portrait” in the orientation section and click “OK.”
This keeps things running smoothly on macOS.
Troubleshooting Common Issues in Vertical Presentations
Switching orientations is always not smooth sailing. Here are some typical challenges and solutions:
Content Alignment
The Issue: Text and images might appear off center after switching to portrait mode.
Solution: Use PowerPoint’s alignment tools and gridlines for the re-adjustment of your content. A little manual tweaking can go a long way.
 Image Distortion
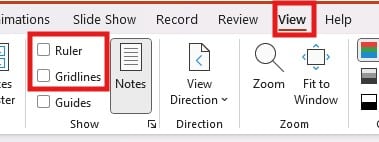 Image Distortion
The Issue: Images might lose clarity or become stretched in vertical format.
Solution: Always insert high-resolution images, and use the Lock Aspect Ratio option when resizing them!
Inconsistent Formatting
The Issue: Your slides might end up looking disjointed if formatting isn’t uniform.
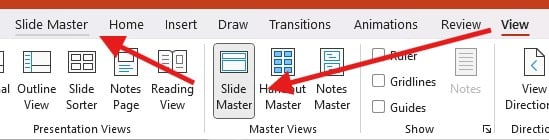
Solution: Create or update your slide master to make sure that all fonts, colors, and spacing remain uniform throughout your presentation.
 Video Integration Glitches
 Video Integration Glitches
The Issue: If videos are not originally designed for vertical playback, they really don’t convert well into that format.
Solution: Edit your video externally, using a video editor, to match the vertical aspect ratio prior to embedding it inside your slide.
Frequently Asked Questions
How do you rotate a PowerPoint 90 degrees?
You can easily flip your slide orientation:
1) Design > Slide Size > Custom Slide Size.
2) Select Portrait (which actually rotates the slide layout).
3) Adjust your layout so everything’s aligned correctly.
How do you make a video vertical in PowerPoint?
To ensure your video will be on a vertical slide:
1) Video editing software must be used to edit your video and change its aspect ratio.
2) Save the changed version and insert it in your slide.
3) Scale down and shift the video to become part of the portrait mode.
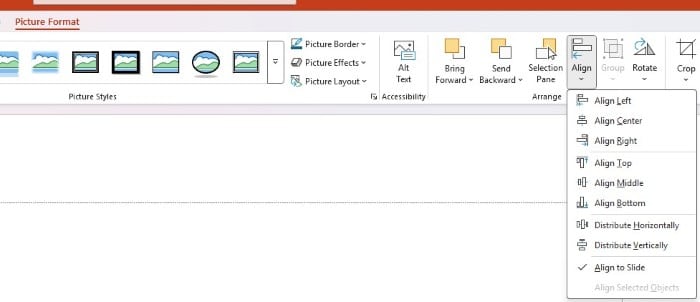
How to change vertical and horizontal alignment in PowerPoint?
In order to align for a precise setup:
1) Select the object you intend to adjust.
2) Tap on the Format tab in an attempt to access the options for aligning the same.
3) Choose the one you desire, center, left, right, top, or bottom to make sure your design is balanced.
 Conclusion
 Conclusion
Making a switch to a vertical format goes beyond a change in how to orientate the PowerPoint. Rather, it is a perfectly strategic decision that can raise the content level, fit mobile audiences, and provide a better visual experience. This guide has provided you with a step-by-step roadmap to find success making a PowerPoint with vertical layout down to the very specific details.
Keep in mind that the way your presentation looks and functions primarily influences how the world perceives your message. And with all these details, tips, and techniques illustrated above, you have all the cards you need to create vertical presentations that will be practical as well as decorative.
If you’d rather hand off the work and get a flawless result, domypowerpoint.com has your back. We craft standout presentations tailored to your needs, vertical, landscape, or a mix. Ready to impress with a professional design? Use our PowerPoint Design Services and let us make your next project a breeze!


