Introduction to curve text in PowerPoint
To enhance your PowerPoint presentations with visually engaging text, curving your text can be an effective technique. This guide provides a step-by-step process to curve text in PowerPoint, along with tips for effective use.
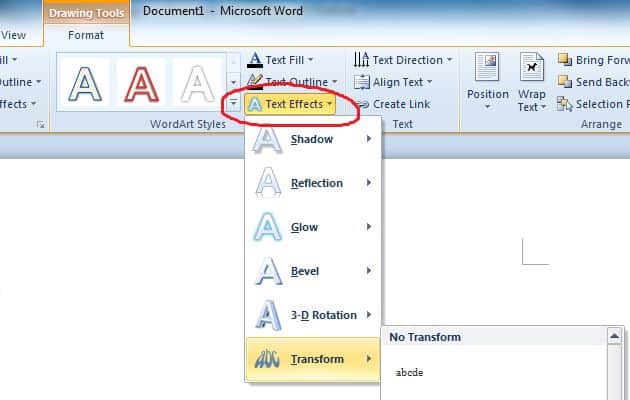
Let’s start with a quick answer to the main question: In PowerPoint, to curve text, select your text, then click on the “Format” tab, click “Text Effects,” then “Transform,” and choose a curved effect like “Arc” or “Circle.” You will then be able to adjust the curve using the yellow handle that appears. If you want detailed instructions and more advanced techniques, read on.
| Step | Action |
| 1 | Select Your Text: Highlight the text you wish to curve. |
| 2 | Go to the ‘Format’ Tab: Click on the ‘Format’ tab on the ribbon. |
| 3 | Choose ‘Text Effects’: Click on ‘Text Effects’ in the ‘Text’ group. |
| 4 | Select ‘Transform’: Choose ‘Transform’ from the Text Effects options. |
| 5 | Apply a Curved Effect: Choose a curved effect like ‘Arc’ or ‘Circle’ and adjust with the yellow handle. |
Be it mere simple arching of text or intricate circular designs, perfection of these skills will affect the quality and impression of your presentations. For further tips, resources, and professional presentation design, check out DomyPowerPoint.com and make your presentations one of a kind.
Understanding Curved Text in PowerPoint
Curved text gives an extra twist to the regular, straightforward text into arches, circles, or waves that introduce creativity and draw emphasis on the slide. It is very effective in:
• Headlines and Titles: Emphasize your key points.
• Logos and Branding: Line text up to a brand’s identity.
• Highlighting Important Information: Bring attention to valued data or messages.
Curved text makes your content more readable and visually interesting and enables your presentations to be better remembered.

How to Curve Text in PowerPoint – Step-by-Step
Curving text in PowerPoint is pretty simple once you know how. Here’s one way you can achieve that:
Using the Transform Tool
1. Open your PowerPoint Presentation: Open the presentation in which you want to insert curved text in PowerPoint.
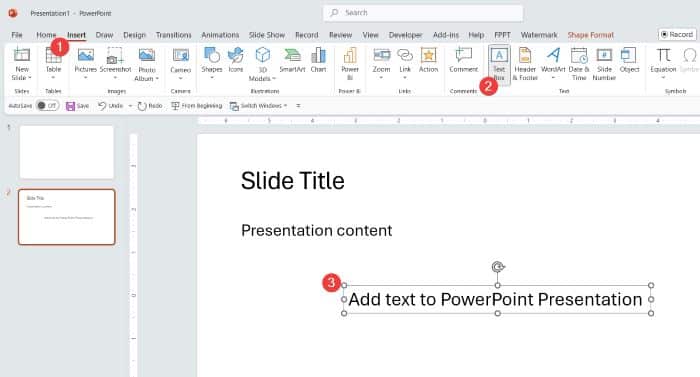
2. Insert a Text Box:
• Click on the Insert tab.
• Click on ‘Text Box’ and draw it on your slide.
• Write your text.
3. Select the Text: Highlight the text you need to curve.
4. Access the Shape Format Tab:
• Click on the Shape Format tab that will appear when the text box is selected.
• Find the WordArt Styles group.
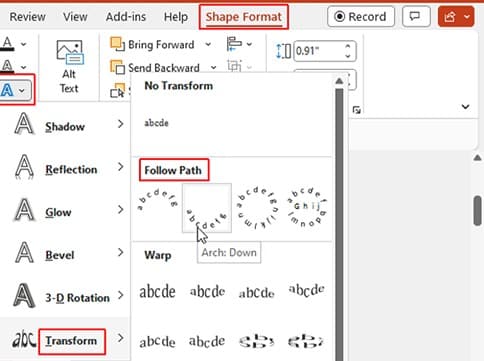
5. Apply Text Effects:
• Click on Text Effects.
• Hover over Transform to show the various ways to shape text.
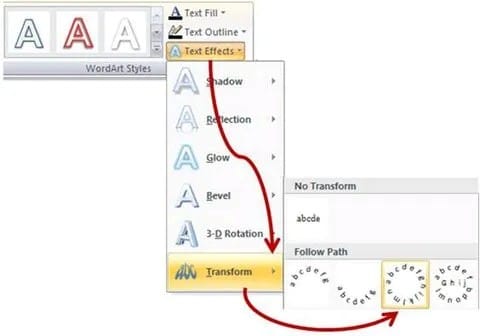
6. Apply a Curve Style:
• Select Follow Path, and then choose either an arch or circular style as you prefer.
• Your text will automatically curve based on your chosen style.
Modifying Curved Text
Once you apply the initial curve, you may need to modify the display of the text:
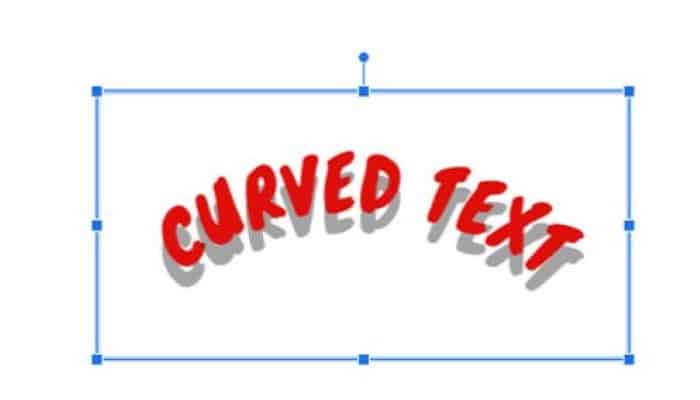
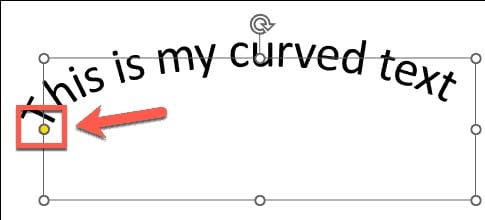
1. Adjust the Curve:
• Click and drag the yellow handle on the curved text to make it more or less curved.
2. Change Font and Size:
• Change the font type and size to best follow the curve for better readability and clarity.
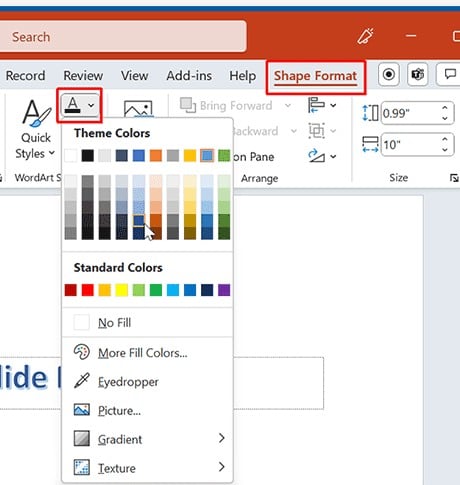
3. Modify the Color and Outline of Text:
• With the Text Fill and Text Outline options under WordArt Styles, set colors to match your slide’s color scheme.
4. Alignment of Text:
• Align your arced text to other elements within your slide.
Following is the reference table for the aforementioned steps in a tabular form:
| Step | Action |
| 1 | Open PowerPoint and open presentation |
| 2 | Insert a text box via Insert > Text Box |
| 3 | Type and highlight your text |
| 4 | Click on Shape Format tab |
| 5 | Select Text Effects > Transform > Click on curve style |
| 6 | Adjust curve with yellow handle |
This practical tutorial will demonstrate how easily text can be inserted into a document and curved, then the size and shape of the curve adjusted.
How to Curve Text in PowerPoint | Applying Text Effects in PowerPoint by Tiny Technical Tutorials
Curving Text in Different PowerPoint Versions
These instructions are a bit different while the general process is the same.
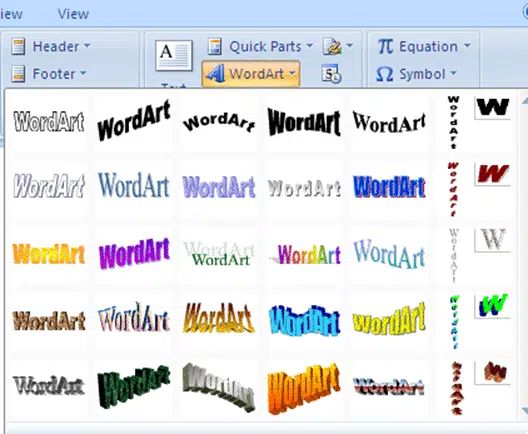
PowerPoint 2007:
1. Go to Insert.
2. Select the WordArt.
3. Go to “Format” > “WordArt Styles.”
4. Click “Text Effects” > “Transform.”
5. Choose a curve effect.
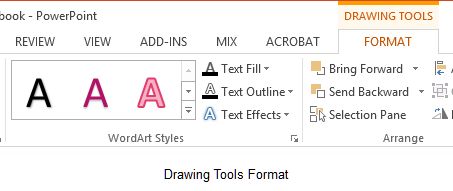
PowerPoint 2010:
1. Select the text.
2. Go to “Drawing Tools” > “Format.”
3. Click “Text Effects” > “Transform.”
4. Choose a curve effect.
PowerPoint 2013:
The process remains the same as it is in PowerPoint 2016 and later versions.
How to curve text in PowerPoint for Mac:
1. Select the text.
2. Go to the “Format” tab.
3. Click “Text Effects” > “Transform.”
4. Choose a curve effect.
How to curve text in PowerPoint for iPad:
1. Select the text.
2. Tap the “Home” tab.
3. Tap “Format” > “Text Effects” > “Transform.”
4. Choose a curve effect.
5. Tips for Using Curved Text Effectively
How to curve text in PowerPoint Online:
Unfortunately, text curving is not supported in PowerPoint Online at this time. You must use the desktop version for this functionality.
Advanced Techniques: Curving Text Around Shapes and Images
How to Curve Text Around a Shape
1. Insert a shape, including but not limited to a circle, onto your slide.
2. Insert a text box and add text.
3. Take the Transform tool and wrap the text around a shape.
4. Manually adjust the size of the text box and the shape so the text aligns perfectly.
How to Curve Text Around a Circle
1. Insert a circle shape onto your slide.
2. Insert a text box and add text.
3. Apply the Circle transform effect under Text Effects > Transform.
4. Fit the text box over the circle.
How to Curve Text Around an Image
1. Insert an image on your slide.
2. Insert a text box and type your text.
3. Use the Transform tool to curve the text around the image.
4. Adjust the size of the text box and the size of the image to align.
Tips for Using Curved Text Effectively
• Keep It Simple: Avoid the use of multiple curved texts on the same slide due to difficulty in readability.
• Contrasting Colors: The color of the text should be in good contrast to the color of its background for better viewability.
• Play with Fonts: Some fonts work better than others with circular text. Generally, sans-serif fonts are easier to read when circular.
• Add Animations: A little subtle animation added to circular text makes it more interesting.
Want to learn more? If you’re also interested in how to embed a YouTube video in a PPT slide, you can enhance your presentations with more engaging multimedia content. You could also consider how to print PowerPoint with notes lines if you need notes for a presentation. Or, if you prefer to focus on audio, check out how to add music to PowerPoint presentation.
For a more polished look, exploring PowerPoint design services might be worth considering. Don’t forget to check the PowerPoint presentation price list to ensure you get the best deal. Alternatively, a PowerPoint design agency can provide professional help for creating the perfect slides.
Troubleshooting Common Issues
Text doesn’t curve: Make sure you’re using a text box or WordArt, not a shape with text.
Curve effect not available: Check that you’re using a supported version of PowerPoint.
Text appears distorted: Try adjusting the text box size or font size.
Alternatives to Curved Text
If you can’t curve text or want to explore other options, consider:
• Using SmartArt graphics for circular or curved text layouts
• Importing curved text as an image from a graphic design program
• Using text boxes arranged in a curved pattern
Conclusion
Mastering the art of curving text in PowerPoint will make your presentations more dynamic and visually appealing. Remember to use this technique sparingly, always keeping readability and overall design coherence in mind.
Keep in mind that practice makes perfect when it comes to curving text in PowerPoint. Do not hesitate to experiment with different effects and techniques that work best for your specific needs in presentations. With these tools at your fingertips, you will be well on your way to creating visually amazing slides!
Have any need for remarkable-looking PowerPoint presentations with curved text and other value-added design elements? For professional help, create really attractive slides that will impress your audience at do my powerpoint (Powepoint design agency).


